How to write a good README for your GitHub project?
It is worth or even necessary to add a README file in every new project. Today we will focus on good practices of writing such a file - with a few examples, and a ready to use template.
What is a README file?
README (as the name suggests: "read me") is the first file one should read when starting a new project. It's a set of useful information about a project, and a kind of manual. A README text file appears in many various places and refers not only to programming. We will focus on a programmer's README, though.
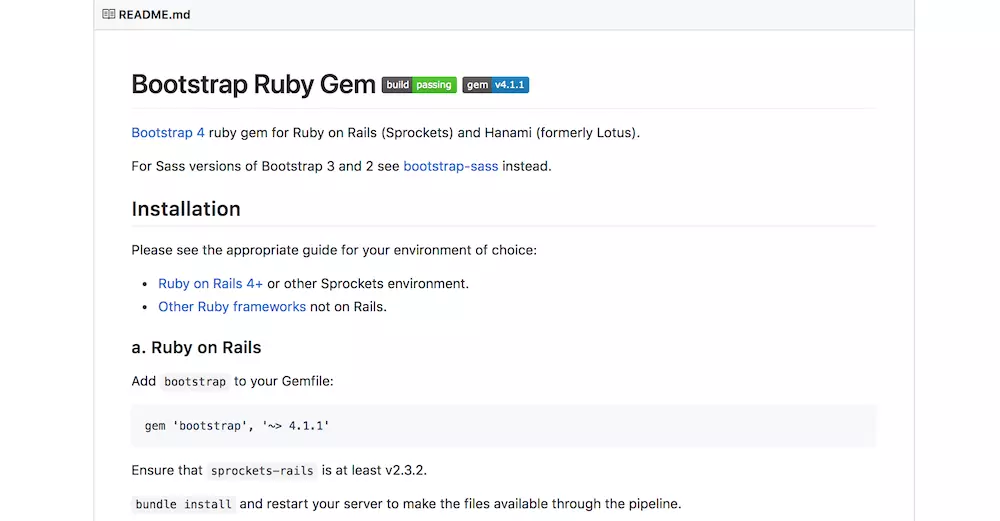
example of README for a Bootstrap gem (Ruby On Rails)
Added README file on GitHub appears under the list of files in a repository.
If we work professionally or learn coding, many times we come across the public repositories. We use the libraries made available by other developers as an open source code or we make our contribution to a project, reporting/fixing bugs, and adding new functionalities. Certainly, we use these projects because they just come in handy, and offer a high quality solution. But would we use them if they lacked a user-friendly description, that is, a good README?
Rest assured - you will get to know the feeling of disappointment when finding a potential solution to all of your problems in a library or a project which description is poor, useless or isn't available whatsoever.
What's the use of writing a good README?
I think you can guess it already. A good README is for others to understand what our code includes, and why it's noteworthy. A README file is also essential to retreive a project - on GitHub but also in browsers (e.g. Google).
I am just learning so why should I be bothered about adding a README file? That code is just for me, after all, not for the whole community.
I doubt the code is just for you. And adding a README file is a good move.
README for Junior Devs
OK, now let's check why we should care for our README files since the first project!
Even if the code is just for you, possibly you will come back to it after a while. A good README enables you to relaunch a project - without wasting your time on recalling: What was it all about?
For a budding programmer, GitHub is a calling card. The projects on GitHub are most often our portfolio. When we're at a career stage without a considerable commercial experience or nice-looking non-profit projects, a presentation of our achievements in a form of repositories is one of the best way to get visible to the recruiters. A preparation of several demonstration projects we want to show off during the interview works the best.
If we are just learning and we drop our training projects there, let's pay attention to their good description. Even a non-technical recruiter will be able to recognize the technologies we touched, and check if it goes in line with a candidate's profile he's/she's looking for.
In Polish or in English?
Certainly, in English. Add a project description in English even if your project is in Polish language. The projects realized at the university might be treated as an exeption as they often demand a documentation in Polish. In every other case, describe your projects in English.
README.md - wait, what's it all about?
.md extension comes from a word: markdown. It's a markup language for text formatting. Maybe at first it isn't be obvious but markup has been created to make text creation easier. In HTML language, the most important heading goes with h1 tag. Similarily, we will have # before a heading in our document.
We edit .md files in any text or code editor (Notepad, Sublime, Atom, CS, etc.).
You'll find out more on markdown usage on GitHub, and on dillinger.io you'll find an editor with a preview.
Writing a good README - newbies manual
Open a README.md. file in a new project.
Make sure the file always includes the following elements:
- Titles and internal titles
- Introduction - the project's aim
- Technologies
- Launch
Consider also using additional elements such as:
- Table of contents
- Illustrations
- Scope of functionalities
- Examples of use
- Project status
- Sources
- Other information
That's a lot! There's not so much to say about my project!
There is - but you're not aware of that already.
Titles and internal titles
A title should explain clearly what we have here, and it's usually a project's name - a H1 heading prefaced with #. If a project's name doesn't disclose its content, still it's worth to suggest what it is.

Moreover, the text should include the titles of sections, and - if necessary - the internal titles. To keep our README coherent, we write them similarly in every other document. In our README.md file, the headings should be written down with a multiple of #:
# header H1
## header H2
### header H3
#### header H4
##### header H5
###### header H6
Introduction
Introduction is like a summary. It shouldn't be too long as we don't want to read an essay on a project. We should describe in an interesting manner what's the project aim, and what problems does a given application solve. Two or three sentences are enough in case of a small project.
If it's a training project, mention your incentive. Why did you want to create it? To learn a particular technology? Was it a hackathon project? Was it for a non-profit organization? Is it an application created to memorize the material from workshops or and online course? It's worth mentioning here, without a doubt.
Technologies
Let's write down the languages we used, the libraries and its versions.
For example:
- Bootstrap 3 or 4
- AngularJS 1.6 / Angular 2+/4/5/6
- PHP 5 or 7
- Python 2.7 or 3.6
- Rails 4 or 5
Why? Firstly, it will be helpful when launching the project in the future. The versions of libraries change, and an inconspicuous change might cause many problems later on. It's good to know the version that has been used when our code was working exactly the way we wanted.
Another thing: recruitment. IT recruiters browse through their candidates' GitHub accounts. Even though they lack a technical knowledge to estimate the quality of solutions, they know the keywords related to their job offers. A description of used technologies might make you stand out among other candidates.
Let's assume there's a multitude of candidates for an internship, and a recruitment time is limited. CVs have been selected, there are two similar candidates, and a last available date in a calendar. The candidates' GitHub accounts include the same number of projects. One of them mentions the technologies in every project. A second candidate doesn't add README files or his/her projects are described poorly. What do you think, which candidate will be invited for an interview?
Launch
How to run a project? Does a project has minimum hardware requirements?
We mentioned the libraries and their versions earlier. If necessary, technologies, launch, and hardware requirements can be merged together. But if we split it into two subsections, it's worth to focus here specifically on launching a project. When we have a website or application, it can concerned setting up a local environment, a link to GitHub pages or deployed application on Heroku. Do we need input data? If so, in what format?
Let's focus on other elements that can improve our README.
Table of contents
Table of contents comes in handy in case of extensive documentation. It can work as a simple list with the links to headings.
GitHub automatically adds id to headings according to the content inside a tag (spaces will become a sign "-"). Therefore, the links are constructed this way: https://github.com/user/repo-name#header-name. It enables to create a simple table of contents, e.g.:
## Table of contents
* [General info](#general-info)
* [Technologies](#technologies)
* [Setup](#setup)

## General info
This project is simple Lorem ipsum dolor generator.

## Technologies
Project is created with:
* Lorem version: 12.3
* Ipsum version: 2.33
* Ament library version: 999

## Setup
To run this project, install it locally using npm:

```
$ cd ../lorem
$ npm install
$ npm start
```
And it will look like:

Illustrations
GitHub allows for graphics in README. A technical documentation doesn't need to be pretty but legible and understandable. The illustrations aren't necessary - nevertheless, they can aesthetical value to our project. You can show an application's logo, diagrams, schemes, exemplary screenshot. Maybe an illustrated manual is something you want?

Create a file in your repository, and add an image there. Use a file path to display it using: . You can use the images from beyond you repository if they're publicly available - but there's always a risk that the owner of these sources would delete them from his/her domain, and they'll disappear from your documentation: 
Example: In my README file, I want to place a block schema that would illustrate how an algorithm works. I keep my schema.jpg file in a directory called images. To display it in my documentation, I will use a code:
Scope of functionalities
There's no always use in describing the scope of functionalities. For a website-visiting card or a simple application of to-do type, the list of functionalities is an excess of form.
On the other hand, a seemingly simple project such as to-do list can be extended with many interesting options we can be proud of: users register, recording and classifying the tasks according to date, adding commentaries to the tasks or data export to the files.

Examples of use
In case of reusable code or your own library, providing a manual how to use our project might be necessary. It can work as a fragment of code:
## Code Examples
To generate lorem ipsum use special shortcode: `put-your-code-here`
which will be displayed as:

The project status
It's worth to add a project status - especially if the project is still being developed. If it's our library, let's mention planned changes, direction of development or to emphasize we're done with its development.
Sources
Should we add information when our project was based on a tutorial or we got inspired with a given task? Yes, sure.
## Sources
This app is inspired by Rando Kim book „Time of Your Life”
and Android app tutorial by [@eericon](https://www.eericon.github.io/post/timer-android)
I don't get the doubts in that matter. There's nothing embarassing in the fact that we learn from various sources and we document our progress. We complete many tutorials, choose learning material. A thoughless copying without providing changes in it - and without learning at all - mostly doesn't happen.
If our code was based on somebody else's code, we should add such information.
Maybe we use an old tutorial - for example, we write an application with Rails 3 tutorial. From scratch, in accordance with Rails 5 version, using new framework mechanisms. Certainly, it's worth mentioning here.

When our code was only inspired by another solution/an application, you can mention it and write the way you got inspired, what changes you made, what functionalities were developed.
When we solve the sets of exercises, it's worth adding where others can find their description. If we will want to come back to these sources, the link will come up easily. This way, the author who shared his/her knowledge is, spent his/her time to prepare and share this material is also respected.
Other information
Information on the author, contact, www and social media links, a type of license under which the code is made available or the information on how to contribute to a project - these are only the examples of what can be added to your project.
A good, legible README
The suggestions above are mine. The most importaint point is just legibility. A thorough documentation make your repository shine in front of the recruiters and other programmers. There are many approaches to writing a good README. Take a look at the following examples:
- Node-chat– a simple description, screenshot of the application, examples of use
- WebApp– a splendid example of description provided for a landing page type of website and application using API. Description how it works, screenshots, technologies employed in this solution, additional information on functionalities that will be implemented
- Pomolectron– we have a logo, the screenshots, an instruction on installation and a description how it works
- Git point– exemplary Android application. A table of content makes navigation easier, the screenshots, mentioned functionalities, and information how to support application's development
README template
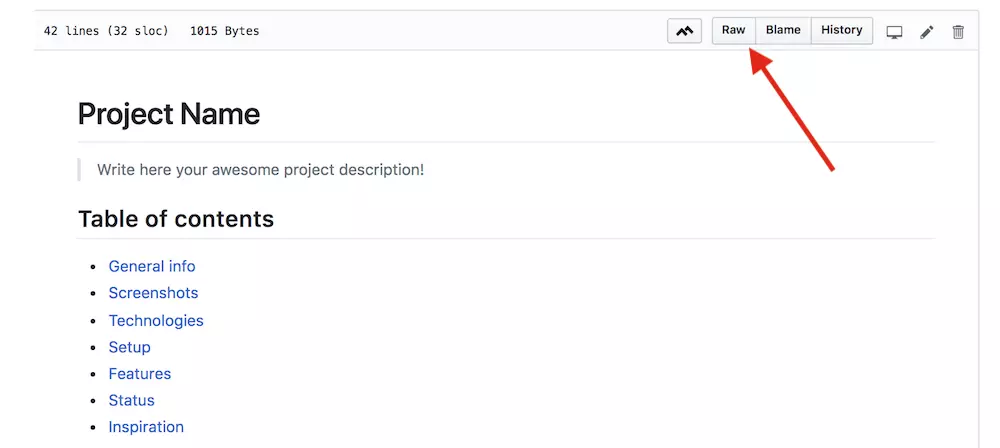
I leave you here an example of README.md file template you can download. Take a look at its formatting, and copy a raw version to your README.md file.
The article is also available in Polish on Flynerd.pl blog.